Crawl Space Encapsulation With South Central Services: What To Expect
April 12th, 2024
3 min read
By Kilian Agha

If you’re having your crawl space encapsulated, you most likely have never experienced encapsulation before. Once a crawl space is encapsulated, its insulation lasts indefinitely with minimal maintenance. But what does the process look like to get to that point?
South Central Services has insulated hundreds of homes near Greencastle with spray foam. Crawl space encapsulation is a popular choice for homeowners due to its impact on energy costs, air quality, and home comfort.
What would the process look like if you got a quote for encapsulation from South Central Services and decided to move forward? Let’s examine the stages of having your crawl space encapsulated by South Central Services.
Don't have time to read right now? Check out everything you need to know at a glance.
Step 1: You Prep Your Crawl Space For Encapsulation.
If you are storing anything in your crawl space, it must be removed and placed somewhere else on your property.
South Central Services is not responsible for moving personal belongings. Nothing can be left behind in your crawl space because it will get in the way of laying down the vapor barrier and spraying the walls.
Step 2: The Spray Foam Rig Arrives.
On the days your encapsulation job is scheduled, South Central Services will arrive with one of our spray foam rigs. You will see either a box truck or a truck with a trailer arrive, parked in the street or your driveway.

These rigs are entirely self-sufficient. We will not need access to any power or utilities in your home.
Step 3: Vacate Your Home.
You cannot be in your home while spray foam insulation is installed. Both residents and pets are required to vacate during installation.
The finished closed cell spray foam in your crawl space will not be hazardous. However, the spray foam chemical reaction creates off-gassing fumes, which we redirect with ventilation outside your home.
To protect themselves while spraying, our installers wear respirators and other personal protective equipment.
The off-gassing fumes will dissipate about 12 to 24 hours after spraying. It will be safe to return home.
Step 4: Existing Insulation Is Removed.
Before encapsulating your crawl space, we must remove any existing insulation.
Most crawl spaces in Pennsylvania have pink fiberglass batts hanging from the ceiling. In many homes, this batt insulation lies useless on the floor.
No matter where the existing insulation is, it must be removed before we encapsulate. This removal could take as much as a full day, depending on the size of your crawl space.
Step 5: Ventilation Is Set Up.
Our installation team sets up ventilation from the crawl space to the outside to direct off-gassing fumes out of the home. Without this ventilation, the fumes created during the installation process would linger for a longer period of time. Ventilation ensures your timely return home.
Step 6: Vapor Barrier Is Installed On The Floors.
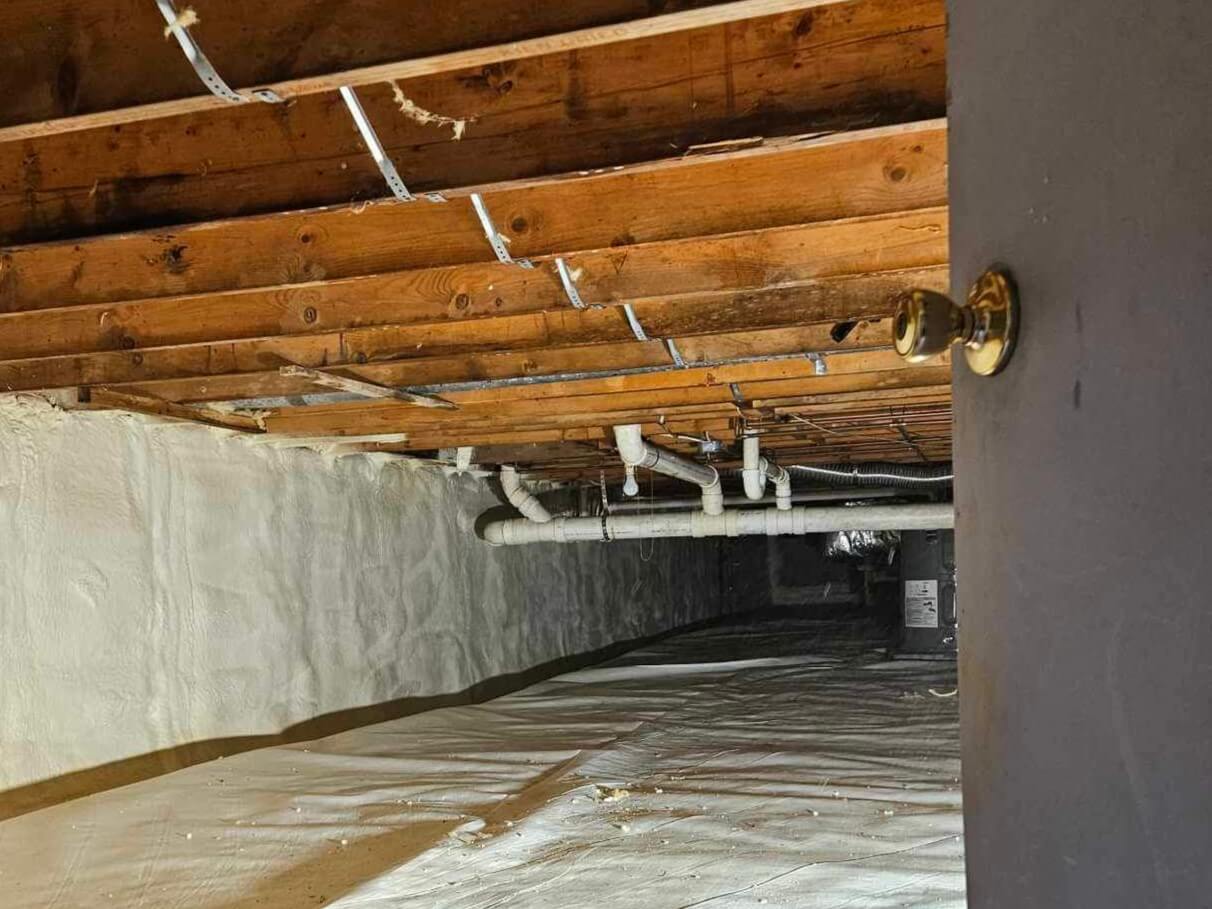
Once the crawl space has been prepped, we begin the encapsulation process. The first element to be completed in an encapsulation is the vapor barrier on the floor.
You can think of a vapor barrier like a swimming pool liner. If a liner is too thin or has a tear, it cannot hold the water of your swimming pool. The same principle applies to vapor barriers.
We use a plastic sheathing that is a minimum of 12 mil thick. For crawl spaces that will experience heavier traffic, we use a 20 mil plastic sheathing. This type of plastic is thick enough to prevent vapor from leaking through the floor and into the crawl space.
Any thinner plastic would not keep vapor out and is more prone to tearing.
When we install this vapor barrier, we seal it tightly around the edges of the crawl space and around any pillars.
Step 7: Closed Cell Spray Foam Is Installed On The Walls.
After installing and sealing the vapor barrier, our crew insulates the walls with closed cell spray foam. Closed cell spray foam is approved for below-grade use. At 2 inches of thickness, closed cell can create a vapor barrier in addition to the thermal insulation barrier.

When we install the spray foam, we are careful to cover the walls completely, including where the walls meet the floor joists in the crawl space ceiling.
Step 8: A Dehumidification System Is Installed.
Once the encapsulation is complete, our team installs a dehumidification system. These systems allow the crawl space to be conditioned, just like the rest of the home.

For any crawl space with HVAC running inside already, we will tap into the existing HVAC for the dehumidification system.
We install a crawl space-specific dehumidifier for crawl spaces that don’t have HVAC.
Step 9: You Return Home.
You can return home 12 to 24 hours after your encapsulation is complete. Anticipate dramatic changes in your comfort and air quality. You’ll also be surprised by how much lower your energy bills are in the first billing cycle after your encapsulation.
How To Start The Crawl Space Encapsulation Process With Us
If you’re ready to have your crawl space encapsulated with South Central Services, your next step is to request your free quote and site visit. We will personally visit your home to examine your crawl space and generate a quote for you.
Our team services areas in southern Pennsylvania, Maryland, Virginia, and West Virginia.
Disclaimer: While we strive to publish information accurate to building science, local building codes and standards supersede our recommendations.
Kilian has co-owned and operated South Central Services for 8 years. He is passionate about community involvement. In his spare time, he enjoys being with his family, playing ice hockey, and going fishing with friends.
Topics:


