

No one wants vermin in their home. Even if the rodents and insects in your crawl space keep to themselves, it is uncomfortable knowing that pests are making a home in your house. Why do rodents invade crawl spaces, and how can you keep them out?
South Central Services has insulated hundreds of new and existing homes with spray foam. Many homes in our service area of southern Pennsylvania have crawl spaces. For homeowners facing rodent infestations in those crawl spaces, it is vital to understand why this happens so you can prevent it from happening again.
By the end of this article, you will understand:
- Why rodents invade crawl spaces
- How to cut off rodent entry points
- What insulation method is best when dealing with rodents
- Whether you should hire a professional or try encapsulation yourself
Don't have time to read right now? Check out everything you need to know at a glance.
Why Are Pests Invading Your Crawl Space?
Rodents and insects have many avenues into the traditional crawl space. Pests can easily find a way inside between vents, open ground, rim joists, and poorly sealed access points.
Crawl spaces are ideal for rodents and insects. Pests like to live in crawl spaces because there’s usually nice nesting material in the ceiling or on the floor. Rodents use fiberglass insulation to create nests.

For insects and vermin, crawl spaces are usually a familiar damp environment. Most crawl spaces mirror the conditions of outside. For pests, there are two significant differences between a crawl space and the outdoors: protection from predators and easy access to a food source.
By taking shelter under your home, rodents can protect themselves from predators outside. They can also easily access your home to find food.
Sealing Off Entry Points For Rodents Will Deter Their Invasion.
If rodents have many pathways into your crawl space and several reasons to burrow inside, the best defense against these pests is to seal off their entry points.

These entry points include your crawl space vents, rim joists, the dirt floor, and the access point you use to enter your crawl space.
By sealing off these areas, the likelihood of pests infesting your crawl space drops dramatically. Persistent pests could get beyond these defenses, but a proper seal in these areas makes it much harder for them to get inside.
Encapsulation Solves Pest Infestation And Other Problems.
So, what will it take to seal off vents, rim joists, the floor, and the door? You could tackle each of these areas independently, or you could invest in a crawl space solution called encapsulation.
Encapsulating your crawl space will address pest infestation and solve other problems in your crawl space. If your crawl space smells musty or is a nightmare to access for plumbing or HVAC, encapsulation can kill three birds with one stone.
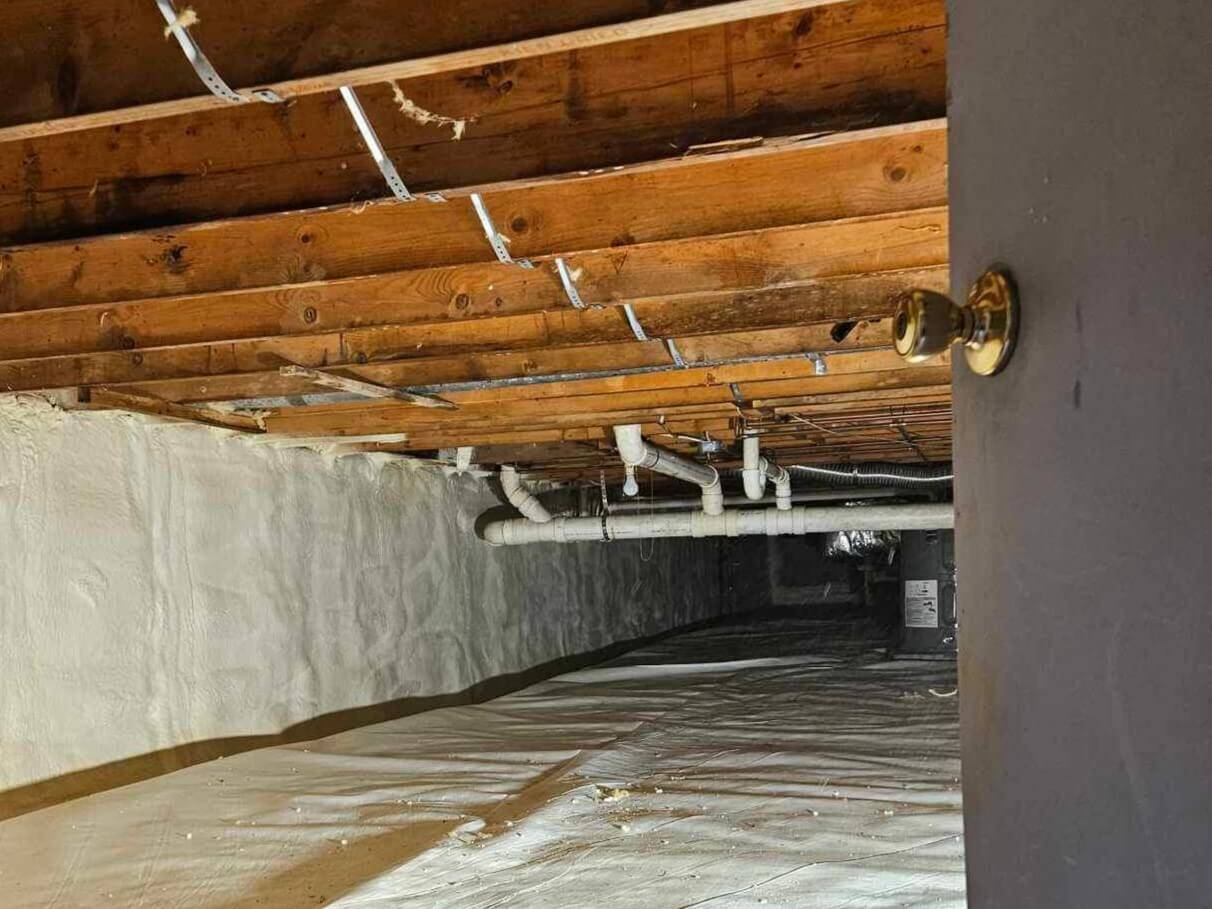
An encapsulated crawl space is a clean, dry, and conditioned space. There is no nesting material for rodents or accessible pathways into the crawl space.

How To Encapsulate A Crawl Space
Crawl space encapsulation has four steps.
- Prepping the crawl space
- Sealing off the floor
- Sealing off the walls
- Setting up dehumidification
Let’s examine each of these steps in more detail.
Step 1: Prepare Your Crawl Space For Encapsulation.
Before you can encapsulate your crawl space, the area needs to be clear.
For some homeowners, the crawl space is a place for storage. Anything stored in the crawl space must be removed.
Existing insulation and tarps should also be removed. Many crawl spaces in our service area have fiberglass insulation and some plastic on the ground. These must be removed to leave the floors and ceiling clear.
The only things remaining in your crawl space should be any plumbing or HVAC equipment.
Step 2: Install A Vapor Barrier On The Floor, Sealing The Edges.
Once the crawl space is cleared out, the first step is to seal the floor. For insects, a dirt floor is easily accessible. This pathway is cut off by laying plastic sheathing on the floor and sealing it at its edges.
This plastic sheathing must be 12 mil or thicker to act as a true vapor barrier. It also must be sealed on the edges to act as a vapor barrier.
Without these stipulations, insects and other pests could get around the barrier easily. Additionally, your crawl space is damp and needs a true vapor barrier to prevent the damp floor from affecting the rest of the space.
Step 3: Spray Closed Cell Foam Insulation On The Walls.
After installing a vapor barrier on the crawl space floor, the walls need a vapor barrier and thermal insulator. The best option for this is closed cell spray foam.
Closed cell spray foam can be spray applied to the crawl space walls, completely sealing off any vents and the rim joists. This eliminates two more access points for rodents.
Additionally, this layer of closed cell insulates your crawl space from outside temperatures and vapor.
Encapsulation can also use foam board insulation for the walls. However, foam board is only an option for flat crawl space walls. Foam board also needs seams and edges to be air-sealed with can foam. Foam board is not seamless like spray foam and cannot seal off rim joists.
Step 4: Step Up A Dehumidification System.
 Once the walls and floor have been sealed off, the last step in encapsulation is setting up a dehumidification system. Whether you purchase an outside dehumidifier or tap into the existing HVAC in your crawl space, the air in your crawl space needs to be conditioned like the rest of your living space. Any air that exchanges after encapsulation is clean and dry.
The access point should be updated to a sealed crawl space door. These insulated door panels are insulated like the walls, ensuring the conditioned air stays within the crawl space. By updating your access point, you eliminate the last easy entry area for rodents.
This improved doorway also ensures that your crawl space stays dry and clean.
Is Encapsulation A DIY, Or Should I Hire A Professional?
Encapsulation can be completed as a DIY. However, we recommend hiring a professional to ensure everything is correctly sealed off. As we mentioned earlier when discussing the wall insulation, foam board is an alternative to spray foam. Foam board is most commonly used for DIY encapsulations.
The biggest problem with foam board is that it cannot seal off rim joists. Unlike spray foam, foam board cannot conform to the unique cavities of rim joists because the product is so rigid. Leaving these areas exposed will compromise all the benefits of encapsulation. An avenue for pests will be left open. That same pathway will allow cold air and vapor to infiltrate.
The Bottom Line About Keeping Rodents Out Of Your Crawl Space
If you have a rodent problem in your crawl space, you are not alone. Many homeowners face pest infestations because crawl spaces are ideal and easy places for insects and vermin to access. Sealing off the entry points for pests should help keep rodents out of your crawl space.
You could independently identify and seal off entry points. However, the more effective method would be encapsulating your crawl space. Encapsulation will solve pest infestations and other crawl space issues, such as a musty smell, high energy bills, and accessibility problems.
Encapsulated crawl spaces are clean, dry, and only accessed by you.
Now that you know how encapsulation can solve your rodent infestation problems, your next step is to:
- Estimate the cost of encapsulation for your crawl space
- Discover the other benefits of encapsulation
- Learn how crawl space encapsulation can impact your taxes

Disclaimer: While we strive to publish information accurate to building science, local building codes and standards supersede our recommendations.
Topics: